Procedure for setting up ECL Comfort controllers (B - types) with one ECA 30.
Example:
3 controllers, ECL 210 B (without display and dial)
One master: Application A266
Two slaves: Application A260, addresses numbers 1 and 2.
One ECA 30.
Demands:
- The master must send T.out to slaves
- ECA 30 must be used for setting all 3 x ECL 210 B controllers
- ECA 30 must be used for monitoring
It is assumed that all connections for sensors, ECL 485 bus, actuators and pumps are done.
The outdoor temperature sensor must be connected to the base part of the master controller.
Procedure:
1. Don't place any ECL controllers in any base part.
2. Connect the ECA 30 to the ECL485 bus (cable type: 2 x twisted pair)
Be sure that the ECL485 bus connections share the common terminal (30) and +12 V (31) for all the base parts with the ECL485's A and B connections.
3. Insert in its base part the ECL controller which must be addressed with the lowest slave number, for example "1".
4. Power up the units. The ECL and ECA 30 are assumed to be new from factory.
4.a. If the controller is not new from factory, do following:
In ECA 30:
> ECA MENU, > ECA factory > Reset ECL addr. > Reset ECL addr. > "Yes".
After 10 sec the ECA returns to "ECA factory" menu. The ECL address has now been set to 15. (See extra info "Reset ECL address" at the end of this document).
4.b.If the ECA 30 is not new from factory, do following:
> ECA MENU, > ECA factory > ECA default, > Restore factory, > (Choose factory), > "Yes".
This will ensure that the ECA has address A and it is connected to address 15 which is required in order to install an application in the ECL controller.
5. Insert the appl.-key A260 in the ECL controller (the slave)
6. Choose language
(the reaction time during steps 5 - 11 seems slow. This is because the ECL controller and the ECA 30 are not fully synchronized)
7. Choose application (not possible for A260 because only one subtype exists).
8. Set Time and date
9. Choose "Next"
10. Display shows shortly "Application A260.1 installed"
- the application is uploaded.
- the display in the ECA 30 is not illuminated for 10 sec.
11. The display shows an application related menu.
12. After 10 - 30 seconds a menu "Copy application" appears (the ECA 30 must know the ECL application)
- Choose "Yes"
(the "Copy" procedure takes some minutes)
13. (Giving the slave an address number)
a. Select an ECL menu
b. Choose MENU
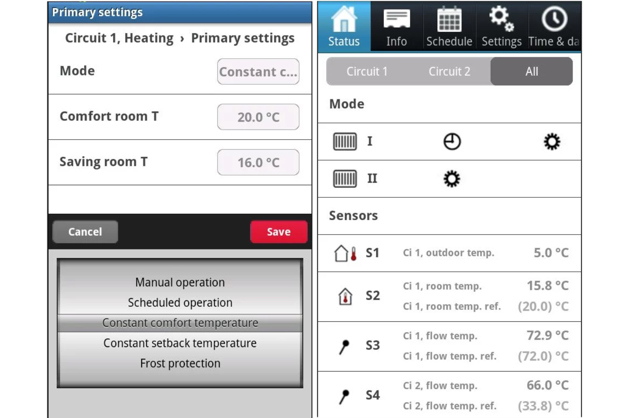
c. Choose "Common controller settings"
d. Choose "System"
e. Choose "Communication"
f. Choose "ECL 485 addr."
g. Select "ECL 485 addr."
- ID = 2048, factory set value is "15"
h. Change the address to the planned address number for this slave
i. After 5 sec, the chosen address number changes to a "0"
j. After further 5 sec, the display returns to "ECA MENU"
- in addition, a controller icon with a cross is present.
This means that there is no communication between the ECL controller and the ECA 30. A master is not present on the ECL 485 bus.
14. (Next ECL set-up)
Insert in its base part the ECL controller which must be addressed with the next slave number, Ex. "2"
15. (Setting the ECA to communicate on address 15)
a. Choose the ECA MENU
b. Choose "ECA system"
c. Choose "ECA communication"
d. Choose "Connection addr."
e. Change to "15"
The "key insertion animation" from the ECL controller will now be shown on the ECA 30.
16. (application upload)
Follow points 6 – 13
If slave 1 and 2 have the same application (same version and language), it is not necessary to copy the application again (point 11).
17. (Next ECL set-up)
Insert in its base part the ECL controller which must be the master (address number 15).
18. Follow points 15.a - 15.e
19. Follow points 6 - 12.
20. The Master controller has address 15 from the factory, so it does not need to be addressed.
21. The entire communication set-up is finished.
22. (to communicate with the master or the slaves)
a. Choose the ECA MENU
b. Choose "ECA system"
c. Choose "ECA communication"
d. Choose "Connection addr. to "15" (= Master), "1" (= Slave no. 1), "2" (= Slave no. 2)
Comments:
Communication with the slaves is only possible when a master (addr. 15) is present in the system.
Newer versions of ECA 30 / 31 have the facility that you can select slave number directly from the display.
Reset ECL address:
The "Reset ECL address" is a special emergency function that can reset the ECL 485 address of all controllers connected to the ECL 485 network to "15" (Master address). This function has been made because it is possible to change the master’s address to something else which will leave the network without a master and the ECL485 bus will therefore no longer function. This is critical if the master controller is a blind controller which needs communication with an ECA 30/31 in order to be operated.
To ensure that the function is not used unless necessary, it is made so that the “Reset ECL address” menu can only be activated if:
* Dead Connection mode is activated (only one bar in the navigation bar in the lower right corner of the ECA 30 / 31's display)
* A master synchronization broadcast signal has not been received for at least 25 seconds
When the reset menu has been activated, the ECA 30 / 31 will send pseudo master broadcasts for 10 seconds in order to bring the ECL controllers out of an initialization phase. The ECA 30 / 31 will then start to send address change commands to ECL 485 addresses 1-14 (Because in some early ECL version it was possible to set the address to 10-14). This will take approximately 15 seconds. As all ECL controllers on the ECL 485 network will get their ECL 485 address changed to 15 it is recommended that all other controllers except for the intended master controller are turned off (or removed from its base part) before this function is activated. The whole operation will take approximately 25 seconds. If multiple controllers end up with address 15 then there is a risk that they will conflict with each other. It is therefore necessary to manually check and reset the ECL 485 addresses of slave controllers after this function has been used.